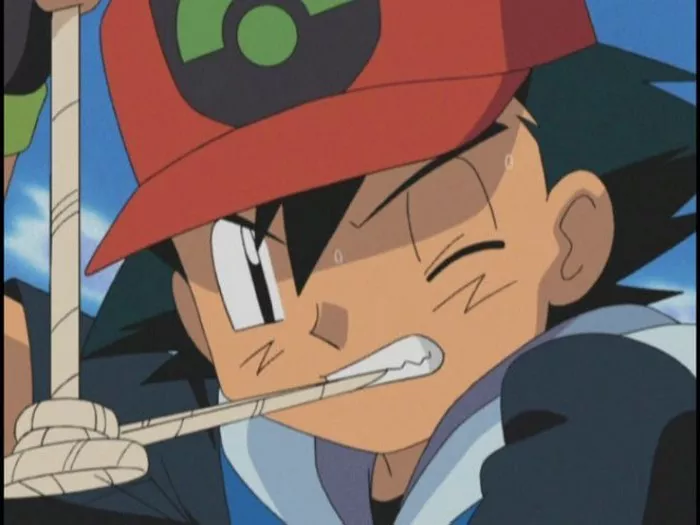
Ash Ketchum, the iconic protagonist of the Pokémon series, has captured the hearts of fans worldwide with his adventurous spirit and unwavering determination to become a Pokémon Master. Whether you’re a seasoned artist or a budding illustrator, learning how to draw Ash Ketchum can be a fun and rewarding experience. In this comprehensive guide, we’ll break down the process of drawing Ash Ketchum into easy-to-follow steps, from sketching the basic shapes to adding the final details that bring this beloved character to life.
Gathering Your Tools
Before we dive into the drawing process, let’s make sure you have the right tools on hand:
Drawing Paper: Choose a smooth, sturdy drawing paper that can withstand multiple layers of pencil and eraser.
Pencils: Opt for a range of pencils with varying degrees of hardness (e.g., HB, 2B, 4B) to achieve different levels of shading and detail.
Eraser: A good quality eraser is essential for making corrections and refining your drawing.
Reference Image: Find a clear, high-resolution image of Ash Ketchum to use as a reference while drawing. This will help ensure accuracy and capture his iconic features.
Step-by-Step Guide
Now that you have your tools ready, let’s begin the drawing process!
Step 1: Sketching the Basic Shapes
Start by lightly sketching the basic shapes and proportions of Ash Ketchum’s head and body. Begin with a circle for the head and add a smaller oval below it for the body. Use light, loose lines to define the position and size of Ash’s features, such as his eyes, nose, mouth, and ears.
Step 2: Adding Facial Features
Refine the shape of Ash’s head and begin adding his facial features. Place two horizontal lines across the circle to indicate the placement of his eyes. Then, sketch two almond-shaped eyes between the lines, leaving space for his nose and mouth below. Add a small, curved line for his nose and a horizontal line for his mouth, slightly tilted upwards at the ends to create a friendly expression. Don’t forget to add Ash’s signature wild, spiky hair on top of his head!
Step 3: Detailing the Eyes and Mouth
Once you’re satisfied with the placement of Ash’s facial features, start adding more detail to his eyes and mouth. Darken the outlines of his eyes and add pupils, highlighting the area around them to create depth and dimension. Draw his eyebrows above his eyes, giving him a determined or curious expression, depending on your reference image. Refine the shape of his mouth, adding lips and teeth as needed to complete his facial features.
Step 4: Defining the Body
Next, focus on sketching the details of Ash’s body, including his clothing and accessories. Use light, gestural lines to outline the shape of his torso, arms, and legs, paying attention to the proportions and positioning of each body part. Add Ash’s iconic clothing elements, such as his red and white cap, blue jacket, fingerless gloves, and black sneakers. Don’t forget to include any additional accessories, such as his backpack or Poké Ball belt, if applicable.
Step 5: Refining the Details
With the basic outline of Ash Ketchum’s figure in place, it’s time to refine the details and add depth to your drawing. Use a darker pencil or fine-tipped pen to define the outlines of his clothing, adding folds, creases, and seams to create a sense of texture and realism. Pay attention to smaller details, such as the stitching on his gloves or the straps on his backpack, to make your drawing more lifelike.
Step 6: Shading and Texture
To add dimension to your drawing, begin shading the various elements of Ash’s outfit and body. Use a combination of hatching, cross-hatching, and blending techniques to create smooth transitions between light and shadow. Pay close attention to the direction of light in your reference image, as this will determine where shadows fall and how they affect the overall form of Ash’s figure. Add texture to his clothing by lightly shading areas with fabric folds or adding subtle details such as seams and wrinkles.
Step 7: Final Touches
Once you’re satisfied with the shading and detailing of your drawing, take a step back and assess the overall composition. Make any final adjustments or refinements as needed to ensure accuracy and balance. Erase any remaining construction lines and stray marks, then add highlights or additional shading to enhance the three-dimensional quality of your drawing. Sign your work and congratulate yourself on successfully capturing the essence of Ash Ketchum!
Conclusion: Gotta Draw ‘Em All!
In conclusion, learning how to draw Ash Ketchum can be a fun and rewarding experience for Pokémon fans of all ages. By breaking down the drawing process into simple steps and paying attention to details, you can create a dynamic and expressive portrait of this beloved character. So grab your pencils, unleash your creativity, and embark on an artistic adventure to become a Pokémon drawing master!


